How to build a roof can be accomplished pretty easily, even if you have no prior roofing experience. Most roofs feature a triangular shape. Forming a triangle shape that’s strong is important in most how to build a roof designs because it gives the roof its strength. The roof also adds much needed strength to the walls of a house.
Building a Pitched Roof
There are several styles of roofs to choose from. Most styles are chosen based on how well they will complement the overall construction of a home. Flat roofs are not typically a popular option in climates that suffer harsh winters. The most popular style roof is a pitched roof, due to its ability to compliment the design of most modern homes and for its strength, durability and longevity. If built right, most pitched roofs have a lifespan of about thirty years.
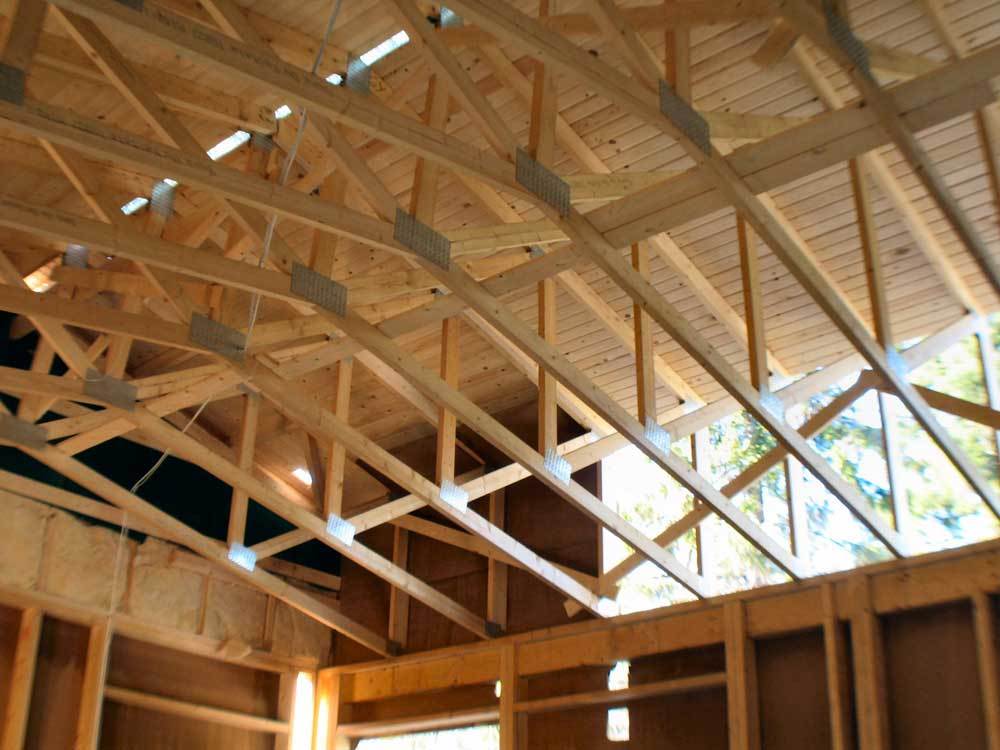
The ridge on a roof is a long board located at the top. This is what the rafters will be nailed to. Rafters are cut so they sit down onto the wall plate, which is fixed down onto the inside skin of cavity walls.
Ceiling joists will span from wall plate to plate and are usually bolted to rafters in order to prevent the roof rafters from spreading or the ridge from dropping. The joist is what completes the triangle shape.
The soffits and fascia are fixed to the ends of the rafters, which are cut in order to accommodate this fit.
Trigonometry comes in handy here. When you’re building a roof, most of the lengths of the rafters will need to be at a ninety degree right angle triangle.
Knowing the span and pitch of the roof is very important because it allows you to work out the lengths of each rafter.
The wall plates that rafters are fixed to will need to be perfectly level and square. In order to be square they need to be parallel and the same distance apart at the end of the roof.
Leveling the wall plates is simple. In order to level them, locate the straightest joist. Lay the joist from one wall plate to the other and use a spirit level on it. You may need to make some adjustments before you begin the roof. Make sure you measure the roof’s span, which is the measurement from the exterior of one wall plate to the exterior of the opposite wall plate.
Next you’ll need to determine the length for the common rafters. These rafters are the main pieces of timber used to build a pitched or hipped roof. Make a collar tie for each rafter pair. These will be attached to the rafter boards that are near the peak of the roof and are used to stabilize the rafters.
Now you’re ready to nail planks to the rafters. Make sure they all run parallel to the ridge.
Next, roll out the tarpaper, nailing it to the planks. Experts recommend beginning at the bottom, overlapping the sheets. Save a piece of tarpaper for the ridge, nailing it in place last.
Now you’re finally ready for the shingles. These are affixed to the tarpaper using roofing nails. Start nailing the shingles at the bottom, overlapping the rows. The rows will also need to be offset in order to ensure that the edges of the shingles have been centered on shingles that are above and below them.
DIY Roofing Repairs
If a damaged shingle needs to be replaced, keep in mind that it’s easier to replace a shingle that’s cool. If the damaged shingle isn’t located in the shade, cool it down using cold water. After it’s cool, you can pry between the shingles using a metal pry bar, which will cause the sealant to simply pop or snap loose. You must also remove the nails from the damaged shingle, in addition to removing the nails from the shingle above it.
Replace missing or damaged shingles with new ones that match in color and follow the application instructions provided by the manufacturer. These shingles should also be hand sealed, considering the sealant will probably not re-seal after it has been broken.
When ridge or hip shingles are blown off the roof it can leave your roof open to snow or water infiltration, allowing moisture to potentially rot the roof deck or enter your attic. Replace ridge or hip cap shingles by removing any damaged pieces. To do, you’ll need to loosen or remove any of the shingles that are in the proximity of missing shingle space in order to allow you to fasten a new ridge or hip cap.
Make sure you select a new ridge or hip shingle that matches well with the existing ones, both in thickness and color. When installing the new shingle, make sure that it fully covers any other field shingles or ridge vent using the proper fastener length.
This job will require you to work on some of the highest points of the roof, so be sure to use the proper safety equipment in order to prevent injuries or falls.
Deciding on the right type of vent to use and the correct amount of ventilation needed is very important. You can look up your local building code for the requirements for balanced attic ventilation in your area. If you fail to follow these requirements, it can lead to weather infiltration or an inefficient system. Always be careful not to cut any wires or attic rafters and make sure you properly fasten a vent in order to prevent weather infiltration or blow-off.
Fixing that Leaky Roof
In order to locate the source of a leak, you’ll need to know where the water will flow. Water flows directly down with gravity. Penetrations, skylights and obstructions are common sources for leaks. Begin by checking the plumbing vents, skylights and chimney. Next, inspect the roof to wall transition areas, such as the eaves, dormers and valleys.
It’s pretty common to think you have a leaky roof when in fact the roof may just not have adequate ventilation. Keep an eye out for soaked insulation, algae stains and rust or black rings around nails. All of these are signs that moisture is condensing in your attic spaces. A leaky roof must be repaired quickly in order to avoid such adverse effects as mold growth.
TIP: Leak proof is one of the most important for the house owners if they want to increase the value of their home and save heating and cooling energy bills. This might be kept in mind while building the roof of the house to keep eye on the proper insulation of the attic. If it’s costly , households can check who qualifies for insulation grants. If you are eligible for it then you can access the free insulation grant.